

How to Plan a Landscape Shoot When You Only Have One Day
Sometimes travel photography gives you several days to wait for the right conditions. Other times, you get one sunrise, one sunset, and whatever happens in between.
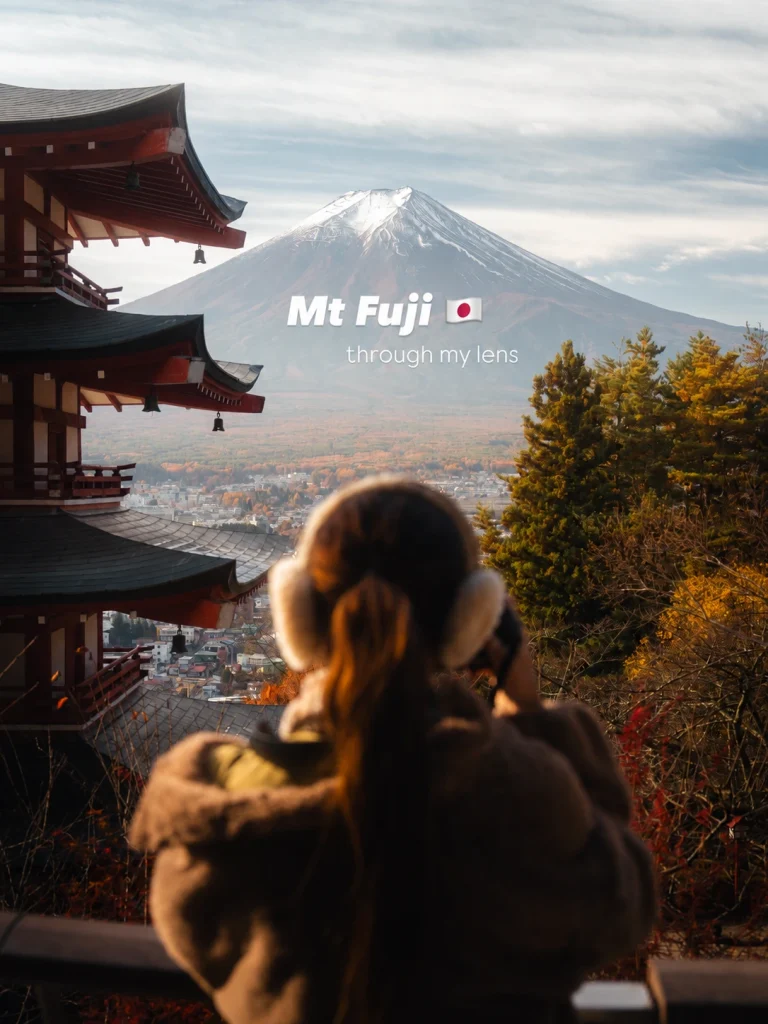
That was exactly what happened to me around Mt. Fuji.
We arrived in Kawaguchiko the night before with no time to scout in person. I had already spent hours researching locations, saving places in Google Maps, looking at inspiration, and figuring out which spots mattered most. That preparation ended up being much more important than I expected.
Our original plan was Chureito Pagoda at sunrise. I woke up at 5 a.m., looked outside, and Mt. Fuji was completely buried in fog.
Instead of sitting around hoping it would clear, we changed direction and headed to the Maple Corridor. I already knew I loved photographing forests in fog, so it felt like the better option for the conditions we actually had. Not long after we arrived, the fog started lifting and we got some of the most incredible light rays I had seen on the trip.
That experience reminded me why I plan photography days pretty carefully. It is not because I expect everything to follow the plan. I plan so that when the weather or light changes, I already know my options.
If you are planning a longer trip, I also have a separate guide with my broader travel photography tips for better landscape photos. This guide is much more specific. It is about what I do when I have one day and need to make that day count.
about the blog

Welcome to my photography blog, your comprehensive guide to mastering the art and science of photography. I’m Paige, ready to guide you on a journey of discovery, from capturing the perfect composition to deciphering the complexities of file formats and storage. This is where we will cover will include in-depth discussions on cameras, exploration of editing techniques, and a deep dive into photography’s fascinating world. Whether you’re a new enthusiast or an experienced photographer seeking to sharpen your skills, I’m committed to helping you elevate your craft to the next level. Welcome to your photography journey!
Subscribe For More!
Be the first to see the latest posts
Table of Contents
Share This Post
Start With the Photos You Actually Want to Come Home With

When I only have one day, I do not start by trying to fit every viewpoint, waterfall, trail, and overlook onto the schedule. I start by asking a much simpler question: What would make this photography day feel successful?
There may be ten places I would love to photograph, but usually only one or two are truly important. Maybe I have been thinking about a particular mountain view for years. Maybe there is a waterfall that only works well at a certain time of day. Or maybe the entire reason I came to the area is to photograph one location during sunrise or sunset. Those become the priorities.
Trying to make every location equally important usually means spending the whole day rushing from one place to another. You may technically visit more spots, but you leave yourself less time to watch the light, find a composition, or wait for conditions to improve.
Rank Your Locations Before the Shoot
I like to think of locations in three simple groups:
- Must photograph
- Would love to photograph
- Backup option
The must-photograph locations get the best parts of the day. The second group fills the time between them when the route and conditions make sense. The backup locations become incredibly important when the weather decides your original plan is not happening. That little bit of prioritizing makes decisions much easier once you are actually out there.
Research Locations Before You Arrive
When the photography window is short, I do as much location research as I can before the trip. For Mt. Fuji, that meant arriving with saved locations, mapped routes, and a good idea of what I wanted to photograph even though I had never had time to scout the area in person. Google Maps is one of the easiest places to start. I save each potential photography location so I can quickly see how they relate to one another. I also look at things like:
- where I can park
- how far I need to walk
- whether there is a trail
- how long it realistically takes to reach the viewpoint
- whether the location has restricted hours
- seasonal access
- anything that could affect how quickly I can get there
I save inspiration photos and videos too. I am not doing that so I can copy someone else’s exact composition. I want to understand what a place looks like from different directions and what might be possible there.
Once I arrive, I still move around and look for my own perspective. Sometimes just changing your height or position can completely change the photograph, which is something I talk more about in my guide to perspective in photography.
Keep the Plan Somewhere Easy to Access
When good light starts happening, I do not want to spend ten minutes scrolling through screenshots trying to remember the name of the next location. I usually keep things simple:
- saved locations in Google Maps
- inspiration saved together
- a rough schedule in my notes
- backup locations included in the same plan
The point is not to build some complicated spreadsheet. It is to remove unnecessary decisions from the actual photography day.
Plan Around the Light, Not Just the Location
Knowing where I want to photograph is only half of the planning. I also want to know what the light is likely to be doing when I get there. Before the shoot, I check sunrise and sunset times and look at the direction the sun will move across the landscape. PhotoPills is especially useful for this because I can get a better idea of where the sun will rise or set in relation to the subject.
I think about whether the scene might work better with:
- side light
- backlight
- soft light before sunrise
- direct light later in the morning
- sunset light
- blue hour

Mountains make this especially important because sunrise on paper does not always mean sunlight will immediately reach the place you are standing. A ridge may block it for another 20 or 30 minutes. I love photographing golden light in landscapes, but I do not try to schedule every location during golden hour. There are only so many minutes of that light in one day.
Decide Where Your Best Light Matters Most
If I only have one sunrise and one sunset, I want to use them intentionally. I usually give those windows to the locations where directional or softer light will make the biggest difference. Other locations may work perfectly well later.
A forest can look beautiful under softer cloud cover. A waterfall may benefit from overcast conditions. Strong midday light can create interesting shapes and contrast. Details can work almost any time if I find the right light.
Understanding how light and shadow shape a landscape helps a lot here. I am not just thinking about whether the light is “good.” I am thinking about what that particular light can do for that particular place.
Check the Weather, Then Plan for More Than One Version of It

Weather forecasts are helpful, but I never want the entire photography plan to depend on one forecast being exactly right. I use tools like Windy to watch clouds, fog, and changing conditions. Then I try to think one step further. Instead of only asking: Will the weather be good? I ask: Which location could look best if this forecast is right?
Clear skies might push me toward an open mountain view. Fog might send me toward a forest. Overcast light can be great for waterfalls and details. Rain can bring out richer colors and create reflections.
When I was photographing Mt. Fuji, the planned sunrise at Chureito Pagoda disappeared behind heavy fog. Had I only planned for that one image, the morning would have felt like a failure.
Instead, we went to the Maple Corridor. The conditions I thought were ruining the original plan ended up creating completely different photographs that I loved. That is also why I keep an eye out for things like puddles, lakes, and wet surfaces when the weather changes. My reflection photography tips go into that side of photographing reflective scenes in more detail.
Build a Realistic Route Between Locations
A one-day photography plan can look great until you realize that half the day is disappearing in the car. Driving is only part of it. You also need time for parking, hiking, setting up, waiting for light, eating, getting back to the car, and occasionally getting a little lost.
I try to group locations that make sense geographically instead of bouncing from one side of an area to another. If two good locations are close together, they may naturally become part of the same morning or afternoon. A place that looks “only 20 minutes away” on the map can easily turn into an hour once you include finding parking, walking to the viewpoint, and getting the camera out.
Leave Empty Time in the Plan
This might be the most important part of building the schedule. Do not fill every minute. If I find incredible light somewhere, I want the option to stay. That buffer also gives me room when the weather changes, traffic slows me down, or a location takes longer to photograph than expected. The schedule should help the day move forward, not make me feel like I am late all day.
Give Each Part of the Day a Purpose
I do not expect every hour of a photography day to produce the same type of image. Instead, I think about what each part of the day might be good for.
Sunrise
This is usually one of my highest-priority locations, especially if I know the scene benefits from soft or directional light.
Morning
I try to photograph nearby locations while the light is still changing. This is also when having a cluster of saved locations can make the day much more efficient.
Midday
Midday does not have to mean putting the camera away. It can be a good time to move to the next area, eat, scout, photograph details, explore forests, or work with scenes that hold up well under stronger light. I do not try to make midday look like golden hour. Sometimes the contrast, color, or texture is exactly what makes the scene interesting.
Afternoon
By afternoon, I want to start working my way toward the evening location instead of arriving at sunset already stressed.
Sunset and Blue Hour
Sunset gets another priority location. And I try not to pack everything away the second the sun drops below the horizon. Some scenes become even better during blue hour.
Read next: Golden Hour vs. Blue Hour: When Is the Best Time to Take Photos?
Prepare Your Gear the Night Before
When I only have one photography day, I want the morning to start with photography, not gear problems.
The night before, I check the basics:
- batteries charged
- memory cards ready
- lenses clean
- tripod packed if I expect to use it
- filters packed
- weather protection ready
- water and hiking essentials in the bag

I also think about which lenses I am actually likely to use. For landscape and travel photography, one of the lenses I reach for most is the Sony 16–35mm f/2.8 GM. I love having the wider focal lengths when I want to capture more of a scene, whether that is a mountain, a forest, or a lake with the landscape stretching out behind it.
I would rather carry a practical setup I know I will use than pack every piece of equipment I own just in case. You can also see the camera gear I use for landscape photography if you are putting together your own field setup.
Know When to Abandon the Original Plan
This is where planning and flexibility have to work together. A good plan should make it easier to change direction. It should not make you feel obligated to stand in one place waiting for something that clearly is not happening.
I start thinking about moving when:
- the subject is completely covered
- better light is developing somewhere else
- fog is making another location more interesting
- the crowd makes the original composition unrealistic
- the conditions fit a different type of scene
- waiting will cost me the only good light at the next priority location
This was probably my biggest lesson from Japan. I had imagined photographing Mt. Fuji for years, so naturally I had certain images in my head. Then the mountain disappeared behind clouds and fog for days. At first, that was frustrating. But some of my favorite images from the trip ended up being the moody photographs I had never planned.
I started looking more closely at fog, trees, textures, details, and atmosphere instead of waiting for the grand landscape to return. The goal is not to force the photograph you imagined. It is to recognize the photograph the day is actually giving you.
What I Learned From Having One Good Day at Mt. Fuji

Our good weather around Mt. Fuji lasted about 24 hours. During that window, we photographed the Maple Corridor, Chureito Pagoda, Lake Shoji, and several other locations around the mountain. The following morning, Fuji disappeared into clouds again.
The preparation did not give us good weather. It did not create the light. It simply meant that when the conditions finally came together, I was ready to move. I was not sitting in the car searching for locations or trying to figure out where sunset might work. Most of those decisions had already been made. And when the original plan failed, I had other options.
That is really what planning a one-day photography shoot is about for me. It is not trying to control the day. It is giving myself enough information that I can respond quickly when the day changes.
That is really what planning a one-day photography shoot is about for me. It is not trying to control the day. It is giving myself enough information that I can respond quickly when the day changes.
My One-Day Landscape Photography Planning Checklist
Before a one-day shoot, I try to have these things figured out:
- Choose one or two priority locations.
- Save secondary and backup locations.
- Add everything to Google Maps.
- Check sunrise and sunset times.
- Check the direction of the light.
- Look at the weather, clouds, and fog forecast.
- Estimate driving and walking times.
- Group nearby locations together.
- Leave extra time between stops.
- Prepare camera gear the night before.
- Know which locations could work in different conditions.
- Be willing to change the plan.

You do not need to predict exactly how the day will go. You just want enough information to make better decisions once you are there.
Final Thoughts
When you only have one day to photograph a place, it is easy to feel like everything has to go perfectly. It probably will not. The light may change. The clouds may show up. The mountain might disappear. A location may be busier than expected. You cannot control any of that.
What you can control is how prepared you are when something good finally happens. I plan enough that I know where I can go, what the light may do, and what my backup options are. Then I try to stay open to whatever the day actually gives me.
Once I get home, editing is where I bring the final light, color, and mood together. You can start with my free Lightroom preset or explore the preset packs I use for my travel and landscape photos. And if you enjoy practical photography tips, travel stories, and the real behind-the-scenes of shoots like this one, you can join me in The Weekly Frame if you have not subscribed yet.
Thanks so much for reading. I hope this helps you spend less time deciding where to go and more time actually photographing the places you traveled to see.
Frequently Asked Questions
How do you plan a landscape photography shoot?
Plan a landscape photography shoot by researching locations, checking the direction and timing of the light, watching the weather, and deciding which locations are your priorities. I also save backup locations so I can change plans quickly when the conditions do not match what I expected.
How do you plan a photography shoot when you only have one day?
When you only have one day, prioritize one or two important locations and build the rest of the schedule around them. Map travel times, plan around sunrise and sunset, leave extra time between stops, and have backup options for changing weather.
What is the best time of day for landscape photography?
Sunrise and sunset often provide softer, more directional light, but there is no single best time for every landscape. The right time depends on the subject, sun direction, weather, and type of photograph you want to create.
How do you plan landscape photography around the weather?
Plan around the weather by matching locations to the conditions instead of relying on one perfect forecast. Fog can work beautifully in forests, overcast skies can suit waterfalls, and clear conditions may be better for open mountain views.
How early should you arrive at a landscape photography location?
Arrive early enough to find your composition and set up before the light you want begins. For sunrise or sunset, I prefer having extra time rather than arriving while the best light is already happening.
What should you do when the weather changes during a landscape photography shoot?
When the weather changes, reassess which of your saved locations works best for the new conditions. Instead of waiting indefinitely for the original plan to return, look for subjects that benefit from the light, fog, clouds, or rain you have.
Should you scout a landscape photography location before a shoot?
Scouting helps, but it is not always possible when traveling. If I cannot scout in person, I research the location beforehand using maps, saved photos, route information, and light direction so I already understand my options when I arrive.
What should you bring on a one-day landscape photography shoot?
Bring the camera and lenses you are most likely to use, charged batteries, prepared memory cards, weather protection, and a tripod or filters when the planned photos require them. Keep the setup practical enough that you are comfortable carrying it throughout the day.
about the blog
Welcome to my photography blog, your comprehensive guide to mastering the art and science of photography. I’m Paige, ready to guide you on a journey of discovery, from capturing the perfect composition to deciphering the complexities of file formats and storage. This is where we will cover will include in-depth discussions on cameras, exploration of editing techniques, and a deep dive into photography’s fascinating world. Whether you’re a budding enthusiast or an experienced photographer seeking to sharpen your skills, I’m committed to helping you elevate your craft to the next level. Get ready to transform your passion into prowess, one click at a time. Welcome to your photography journey!
Share This Post
Subscribe For More!
Be the first to see the latest posts
More Photography Posts


What I use as a Professional Photographer – Camera Gear
Camera gear is a bottomless black pit that will suck up all your money… What do I use and why do I love it? Don’t buy things you don’t need.

Shooting In Raw – Understanding Bit Depth and Dynamic Range
Don’t just do it, understand why you do it! The answer to your editing struggles might be in your file type.