

How to Take Better Landscape Photos With a Wide-Angle Lens
Wide-angle lenses are some of the lenses I reach for most when I’m shooting landscapes and traveling. I love being able to capture the full sweep of a scene, whether that’s a mountain, canyon, forest, temple, or road disappearing into the distance. But shooting wider doesn’t automatically make a landscape photo better.
One of the easiest mistakes is pointing a wide lens toward a beautiful view and assuming that fitting more into the frame will make the photo feel bigger or more dramatic. Sometimes it does the opposite. The mountain gets smaller, the bottom of the frame fills with empty ground, and the scene loses its focus.
For me, the goal isn’t simply to fit more into the frame. It’s to make all that extra space feel intentional.
about the blog

Welcome to my photography blog, your comprehensive guide to mastering the art and science of photography. I’m Paige, ready to guide you on a journey of discovery, from capturing the perfect composition to deciphering the complexities of file formats and storage. This is where we will cover will include in-depth discussions on cameras, exploration of editing techniques, and a deep dive into photography’s fascinating world. Whether you’re a new enthusiast or an experienced photographer seeking to sharpen your skills, I’m committed to helping you elevate your craft to the next level. Welcome to your photography journey!
Subscribe For More!
Be the first to see the latest posts
Table of Contents
Share This Post
What a Wide-Angle Lens Changes in a Landscape Photo

A wide-angle lens lets you include more of the scene, but that’s only part of what makes it useful. It also changes how objects relate to each other. Anything close to the camera can feel larger and more prominent, while distant mountains and other background elements may appear farther away.
When you use that intentionally, it can create a really strong sense of depth. That’s one reason foregrounds become especially important when I’m shooting wide. A rock a few feet from the camera can become a major part of the composition.
A road can stretch from the bottom of the frame toward a distant mountain. Wildflowers can feel much more prominent when I move close to them. If you’re still learning how different focal lengths change the way a scene looks, my guide to focal length in photography goes into that in more detail.
Wide Doesn't Always Mean Better
I love shooting at the wide end of my lenses, but I don’t automatically go as wide as possible. Sometimes 16mm is exactly what the scene needs. Other times, that same focal length makes the subject I care about look tiny.
If a mountain is supposed to be the main focal point but suddenly becomes a small shape in the distance, I’ll zoom in a little and see whether the composition feels stronger. That’s one reason I like wide zoom lenses. I can capture the full environment when I want it, then tighten the frame without changing lenses.
If you’re new to choosing lenses in general, I also have a guide explaining the different types of camera lenses and what they do.

How to Build a Strong Wide-Angle Composition
One of my goals with travel and landscape photos is to make you feel like you could step into the scene and stand there with me. A wide-angle lens can be really good at creating that feeling, but only when the different parts of the frame actually work together. When I’m shooting wide, I try to look beyond the big view in the distance and pay attention to everything around me.
Look for Something Interesting in the Foreground
One thing I constantly remind myself is to stop staring only at the horizon. Some of the best parts of the composition may be right at my feet. Before I take the wide shot, I’ll look for something that can give the bottom of the frame a purpose.
That might be:
- textured rock
- cracked earth
- wildflowers
- water
- a winding road
- repeating patterns
- a canyon edge
- grasses or branches

A strong foreground can make the scene feel more immersive because it gives your eye somewhere to enter the photo before moving toward the background. I use this a lot in desert landscapes. A textured rock surface or curving canyon wall can completely change a composition that would otherwise be mostly empty ground.
The foreground doesn’t need to be dramatic. It just needs to contribute something. I talk more about bringing foreground, middle ground, and background together in my guide to creating depth in landscape photography.
Get Closer and Lower
Once I find something interesting in the foreground, I usually experiment with how close I can get to it. Wide lenses exaggerate objects that are close to the camera, and that can work in your favor. A small patch of flowers may become a major foreground element. Rock patterns can stretch through the bottom of the frame. A road can feel like it’s pulling you directly into the scene.
Changing camera height can make just as much difference. Dropping the camera closer to knee height or even lower can make a small foreground element feel much more important compared with the background. I don’t do this automatically for every shot. Sometimes eye level is better. The point is to move around and see how the relationship between the foreground and background changes. That’s one of the reasons perspective matters so much in photography.
Use Details to Give the Scene More Context

A wide frame also gives me room to include small details that tell you something about where I am. That might be patterns carved into a rock, architecture, a road, a person in the distance, or something unique to the location. People can be especially useful for scale.
A huge canyon or temple can be difficult to understand without something familiar in the frame. Adding a small person can immediately show how large the scene really is without taking attention away from the landscape.
Give the Eye Somewhere to Go
Wide-angle frames can contain a lot of information, so I usually look for something that connects the different parts of the scene. Roads are an obvious example, but leading lines can be much more subtle.
I look for rivers, shorelines, canyon walls, cracks in rocks, shadows, repeating shapes, and curves that naturally move through the frame. The line doesn’t always need to point directly at the subject. Sometimes it simply helps your eye move from the foreground into the middle ground and toward the background.
Check the Edges of the Frame
This is something I always have to pay attention to because wide lenses bring in so much more than what I’m looking at in the center. Before I take the shot, I scan the edges. Is there a branch sticking into the corner? A bright rock pulling attention away from the subject? A person cut in half at the edge? A large empty area that isn’t adding anything?
This becomes especially important in busy travel locations. If there are a lot of people around, I may move to the side, change my height, or look for light and shadow that helps simplify the scene instead of automatically shooting from the most obvious viewpoint. People can also look stretched when they get too close to the edges of a very wide frame, so I pay attention to where I place them. Sometimes cleaning up those little distractions makes a bigger difference than changing any camera setting.
Decide What You Want the Foreground to Do
A foreground doesn’t always need to be perfectly sharp. Sometimes I want it full of detail because it’s an important part of the composition. Other times, I want it softer so it supports the main subject without competing with it.
Keep the Foreground Sharp When the Detail Matters
If the foreground is one of the strongest parts of the shot, I usually want enough depth of field to keep that detail visible. This works well with rocks, cracked ground, flowers, or repeating textures.
A smaller aperture can help bring more of the scene into focus, but there are times when the foreground is so close that one frame won’t keep everything from front to back sharp. That’s where focus stacking for landscape photography can be useful.
Let the Foreground Blur When It Should Support the Subject
A softer foreground can work really well too. I sometimes shoot through leaves, flowers, grasses, or other nearby elements and let them fall out of focus around the subject. They still add color, depth, and context, but they don’t demand as much attention.
This is why I don’t follow a rule that says foreground interest always needs to be sharp. I decide based on where I want you to look. If the foreground is helping lead you into the photo, I may keep more detail in it. If the mountain or person is clearly the subject, a softer foreground may help strengthen that focal point in the photo.
Why I Like Wide Zooms for Landscape and Travel Photography
I use wide lenses constantly, but I also want my gear to be practical when I’m traveling. I’m often carrying a camera for hours, walking through cities, hiking, or moving between locations. So while image quality matters a lot, I also care about whether I actually want to carry the lens all day. I think about lenses as a long-term investment too. I want each one in my bag to give me something different rather than buying several lenses that mostly do the same job.
Sony 16-35mm f/2.8 GM
The Sony 16-35mm f/2.8 GM has been one of the lenses I reach for most when I’m shooting travel and landscapes. At 16mm, I can capture the full sweep of a scene. I’ve used that kind of width for mountains, forests, architecture, lakes, and locations where I really want to show the environment around the subject. Then I can move toward 35mm when I don’t need quite as much in the frame.
My main Sony setup covers 16mm through 200mm across three lenses, and that range handles almost everything I shoot. It’s rare that I need anything wider than 16mm. If I need something really specialized, I’d usually rather rent it than buy another lens that spends most of its time sitting at home.
Tamron 16-30mm f/2.8 G2
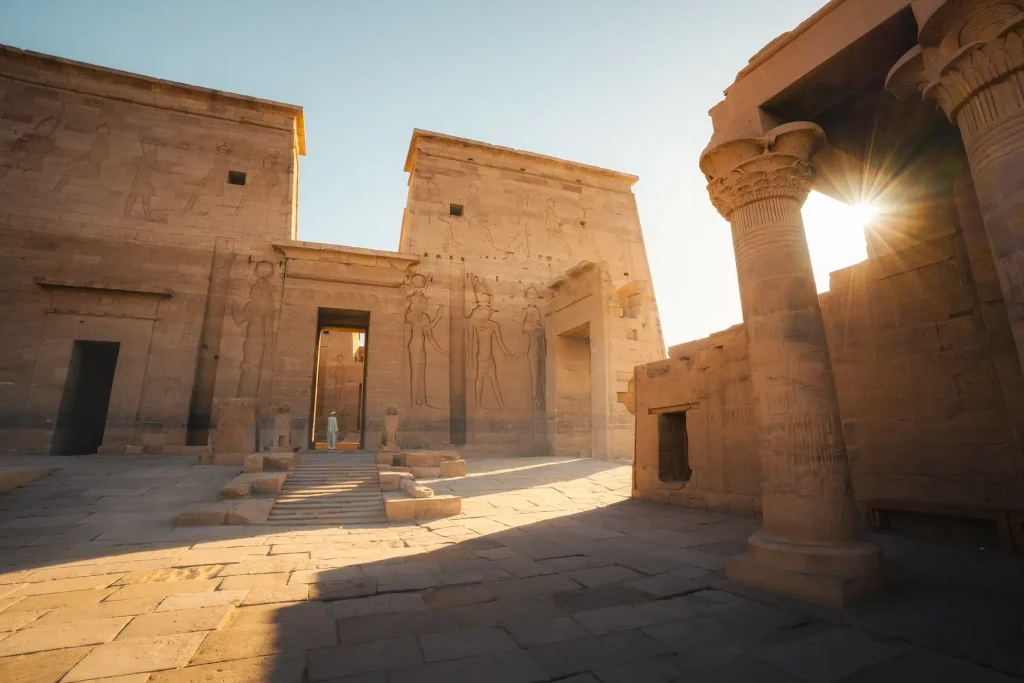
I also had the chance to use the Tamron 16-30mm f/2.8 G2 while traveling through Egypt. What stood out to me was how light and compact it felt while still giving me really sharp images. I carried it through markets and ancient temples, used it for wider landscapes and architecture, and even shot handheld in very low light.
The 16mm end gave me plenty of room when I wanted the full environment, while zooming toward 30mm let me create tighter frames when I didn’t want everything to feel extremely wide. The constant f/2.8 aperture gave me extra flexibility as the light dropped and also let me create separation when I wanted the foreground or background to feel softer.
Trips like that are a good reminder that I don’t choose travel gear based on image quality alone. I need it to be something I’m comfortable carrying for hours and using in whatever conditions the day gives me. You can see more of the camera gear I use for landscape and travel photography if you’re building your own setup.
Know When to Put the Wide-Angle Lens Away

As much as I love wide lenses, there are plenty of scenes where they’re not the best choice. If going wider makes the main subject tiny, it probably isn’t helping. The same is true when the foreground has nothing interesting to contribute. A huge amount of empty space at the bottom of the frame can weaken an otherwise great view.
I also reach for something longer when I want to isolate one mountain, simplify a busy scene, or bring distant layers closer together. A telephoto lens can make overlapping ridges feel much more compressed, while a wide lens tends to exaggerate the distance between them. My guide to lens compression in photography shows how that changes the look of a landscape.
Sometimes I arrive somewhere expecting to shoot wide and end up liking the tighter frame much more. That’s why I try not to decide what focal length a location needs before I actually look at the scene. Before I automatically zoom all the way out, I ask myself what I want people to notice. If going wider makes that subject weaker, I zoom in.
A wide-angle lens is useful because it gives you room to work with the whole scene, but the goal isn’t simply to fit as much as possible into one photo. Look at the big view, but also look down. Move closer. Change your height. Pay attention to the foreground. Look for details that give the place context. Follow the lines through the frame and check the corners before you take the shot. And if the scene doesn’t need all that extra space, don’t be afraid to go tighter.
Thanks so much for reading. I hope this gives you a few new things to try the next time you head out with a wide lens.
Curious how I edit my travel and landscape photos? You can start with my free Lightroom preset or explore the preset packs I use for my own photos. They’re designed for both mobile and desktop and give you a starting point you can adjust for your own light and color.
And if you enjoy practical photography tips, travel stories, and behind-the-scenes updates from my shoots, you can join me in The Weekly Frame if you haven’t subscribed yet.
Frequently Asked Questions
Is a wide-angle lens good for landscape photography?
Yes, a wide-angle lens is a great choice for landscape photography when you want to include more of the scene and create a stronger sense of depth. I especially like using one when an interesting foreground helps pull the viewer into the photo.
What focal length is best for wide-angle landscape photography?
A focal length around 16mm to 35mm works well for many wide-angle landscape photos. I often use the wider end for expansive scenes, then zoom in a little if going too wide makes the main subject feel too small.
How do you use a wide-angle lens for landscape photography?
Use a wide-angle lens by combining a clear subject with foreground, depth, and lines that help connect the frame. I also move closer, change my camera height, and check the edges carefully because wide lenses can include more than you notice at first.
How do you compose a landscape photo with a wide-angle lens?
Start with a clear focal point, then use foreground elements, layers, and natural lines to guide the eye through the scene. I try not to include more just because the lens allows it, and I remove anything that does not help the composition.
Do you need foreground interest with a wide-angle lens?
You do not always need foreground interest, but it can make a wide-angle landscape photo feel much more immersive. Rocks, flowers, roads, water, and other nearby elements can create depth and give the lower part of the frame a purpose.
What aperture is best for wide-angle landscape photography?
Apertures around f/8 to f/11 often work well when you want more of a wide-angle landscape to stay sharp. I use a wider aperture when I want a softer foreground or background, or when I need more light in lower-light conditions.
Why do my wide-angle landscape photos look flat?
Wide-angle landscape photos can look flat when the frame lacks foreground, layering, or a clear focal point. Try moving closer to an interesting element, changing your camera height, or using light and lines to create more separation between the foreground and background.
When should you not use a wide-angle lens for landscapes?
Avoid using a wide-angle lens when it makes your main subject too small, adds unnecessary empty space, or brings too many distractions into the frame. In those situations, I usually zoom in or switch to a longer focal length to simplify the scene and give the subject more impact.
about the blog
Welcome to my photography blog, your comprehensive guide to mastering the art and science of photography. I’m Paige, ready to guide you on a journey of discovery, from capturing the perfect composition to deciphering the complexities of file formats and storage. This is where we will cover will include in-depth discussions on cameras, exploration of editing techniques, and a deep dive into photography’s fascinating world. Whether you’re a budding enthusiast or an experienced photographer seeking to sharpen your skills, I’m committed to helping you elevate your craft to the next level. Get ready to transform your passion into prowess, one click at a time. Welcome to your photography journey!
Share This Post
Subscribe For More!
Be the first to see the latest posts
More Photography Posts


What I use as a Professional Photographer – Camera Gear
Camera gear is a bottomless black pit that will suck up all your money… What do I use and why do I love it? Don’t buy things you don’t need.

Shooting In Raw – Understanding Bit Depth and Dynamic Range
Don’t just do it, understand why you do it! The answer to your editing struggles might be in your file type.