

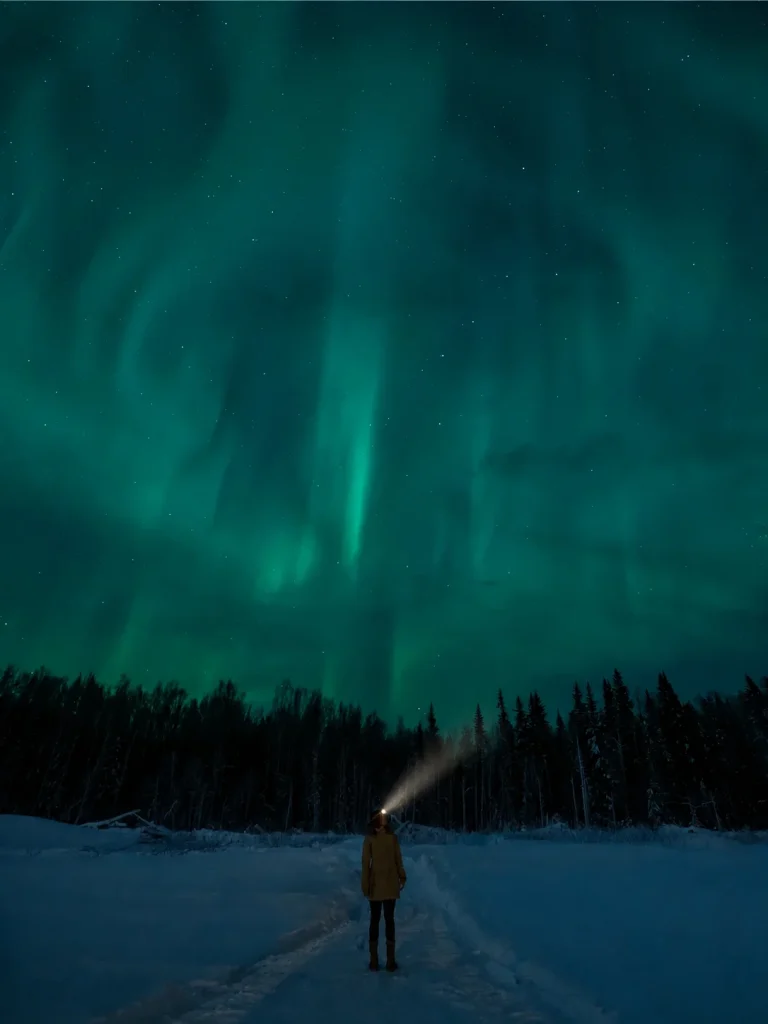
How I Photograph the Northern Lights
The Northern Lights, also known as the aurora borealis, are one of those things that feel completely different once you’re actually standing underneath them. The sky can go from barely showing color to suddenly filling with bright, moving shapes, and sometimes that change happens incredibly fast.
That’s what makes shooting the aurora different from capturing a normal starry sky. I don’t set my camera once and assume those settings will work for the rest of the night. I watch how bright the lights are, how quickly they’re moving, and how the landscape is working with the sky, then adjust from there.
Some of my Northern Lights images are single exposures, while others are composites when I need different exposures for the sky and foreground. There isn’t one perfect formula for aurora borealis photography, but there are a few settings and decisions I come back to every time I’m out shooting.
about the blog

Welcome to my photography blog, your comprehensive guide to mastering the art and science of photography. I’m Paige, ready to guide you on a journey of discovery, from capturing the perfect composition to deciphering the complexities of file formats and storage. This is where we will cover will include in-depth discussions on cameras, exploration of editing techniques, and a deep dive into photography’s fascinating world. Whether you’re a new enthusiast or an experienced photographer seeking to sharpen your skills, I’m committed to helping you elevate your craft to the next level. Welcome to your photography journey!
Subscribe For More!
Be the first to see the latest posts
Table of Contents
Share This Post
Disclosure: Please be aware that some of the links in this post are affiliate links, and I may receive a commission if you make a purchase using those links. However, I only recommend products or services that I personally use or believe will be valuable to my readers. Affiliate links are a way for me to earn a small commission and keep providing you with high-quality content. If you have any questions or concerns, please feel free to contact me through my contact page. Thank you for your support!
The Camera Settings I Start With for Northern Lights Photography
When I’m shooting the Northern Lights, I usually start with a wide, fast lens, a sturdy tripod, and my camera in manual mode. Those are the same basic tools I use for other types of night-sky photography, but the settings themselves need to respond to what the aurora is actually doing.
If you’re still getting comfortable changing aperture, shutter speed, and ISO yourself, understanding how to shoot in manual mode makes it much easier to react quickly when the lights start changing.
Shutter Speed
My shutter speed typically falls somewhere around 5 to 10 seconds, depending on how fast the aurora is moving. That range is a starting point, not a rule.
If the Northern Lights are moving quickly, I pay more attention to keeping definition in their shape instead of automatically leaving the shutter open as long as possible. If the lights are moving more slowly, I have a little more flexibility to use a longer exposure.
That’s one of the biggest differences between shooting the aurora and simply capturing stars. With the aurora borealis, you’re not only thinking about getting enough light into the camera. You’re also deciding how much of its movement you want to preserve.
Shutter speed has a huge effect on how motion looks in the final image. My guide to using shutter speed to control motion and exposure goes deeper into how that works if you’re still getting comfortable with longer exposures.
ISO and Aperture
For the Northern Lights, my ISO is often somewhere around 3200 to 8000. That can feel high if you’re used to trying to keep your ISO as low as possible, but shooting at night is different. I would rather bring in enough light and come home with a usable image than keep my ISO low just for the sake of avoiding noise.
I also use a wide, fast lens and keep the aperture open enough to bring in the light I need. A lens around f/2.8 or faster is a great place to start. The exact ISO I use can change as the aurora gets brighter or darker. I’m looking at the entire exposure rather than trying to stay at one number all night.
How I Focus in the Dark
I focus on the stars to help keep the aurora sharp. Autofocus can struggle once it gets really dark, so I make sure I have focus before I get too caught up in shooting. I’ll still check it again throughout the night, especially after moving the camera, touching the lens, or changing my composition.
A good exposure doesn’t help much if you get home and realize the entire sky is slightly soft.
How I Adjust My Settings as the Aurora Changes
One of the biggest things I’ve learned from shooting the Northern Lights is that the settings that worked a few minutes ago might not be the settings I want a few minutes later. The aurora can change in both brightness and movement, and I’m paying attention to both.
When the Aurora Is Moving Faster
When the lights start moving faster, I tend to work toward the shorter end of my shutter-speed range. I want to capture some of the definition and shape I’m seeing instead of letting everything blend together into one soft green area.
If I notice that those defined ribbons or shapes are starting to look too blurred in my images, that tells me it may be time to shorten the exposure. I’m not necessarily changing settings after every frame. I’m watching the sky and adjusting when the movement changes enough that I want the image to look different.
When the Aurora Is Fainter or Moving More Slowly
When the aurora is less intense or moving more slowly, I have a little more flexibility to leave the shutter open longer. This is where I really like to experiment. I’ll take a shot, look at what I captured, and decide whether I need more light or whether I’m starting to lose too much definition.
I don’t think memorizing one exact setting is nearly as helpful as understanding what each setting is doing. Once you know that, you can react to the actual conditions instead of trying to force every Northern Lights scene into the same recipe.
When the Sky Suddenly Gets Brighter
The brightness of the aurora borealis can change quickly too. If the lights suddenly become much stronger, I recheck my exposure instead of assuming my starting settings are still right. I may shorten the shutter speed or lower my ISO so the brightest areas keep more detail.
This is where understanding how all three exposure settings work together really helps. My explanation of aperture, shutter speed, and ISO in the exposure triangle breaks down that relationship in more detail.
The goal for me is always a balance between bringing in enough light and keeping the movement and texture of the aurora the way I want it to look.
How I Compose the Northern Lights as Part of the Landscape
The Northern Lights are obviously going to grab a lot of attention, but I still want the rest of the frame to work as a landscape image. It’s really easy to get excited, point the camera toward the brightest area of the sky, and forget about everything happening underneath it. I try to slow down enough to look at the entire scene.


Start With More Than Just the Sky
A mountain, tree, building, body of water, or person can give the Northern Lights context and help show the scale of what you’re seeing. I use foregrounds at night for the same reason I use them in my daytime landscape work. They can give the viewer somewhere to enter the frame and make the scene feel more immersive.
But I don’t add foreground elements just because I think every night-sky image is supposed to have one. I still want a clear subject, and I want everything else in the frame to support it. That same idea is at the center of how I use focal points to build stronger photography compositions.
With the aurora, the sky may be the first thing that catches your attention, but the elements underneath it are what can make the image feel like a real place and a real experience.
Let the Aurora Change the Composition
I don’t asssume that the composition I chose before the lights appeared is the one I have to keep all night. The aurora moves. If the strongest light shifts somewhere else in the sky, I may reframe. If the lights start stretching upward, I might switch to a vertical composition. If they spread across the horizon, I may prefer a wider horizontal frame that includes more of the landscape.
I’m reacting to the sky instead of trying to force it into the composition I originally planned. That’s one of the things I love about shooting changing light. I can plan as much as possible beforehand, but once I’m there, I still have to work with what the light is actually giving me.
Use Reflections and Scale When They Add Something
Water can be especially interesting with the Northern Lights because it gives you the chance to bring the color of the sky into another part of the image. I use reflections to create stronger landscape compositions in a lot of my daytime work, and that same approach can make an aurora scene feel even more immersive.
Scale can be just as powerful. A small person, tree, cabin, or mountain underneath a huge sky can make the aurora feel even bigger. I use that relationship intentionally when creating a sense of scale in landscape photography instead of adding a person or object simply because the frame feels empty. The goal is for the sky, foreground, and subject to feel like parts of the same image.
Horizontal vs. Vertical
I don’t automatically choose one orientation when I’m shooting the Northern Lights. If the aurora spreads across the sky and I want to include more of the landscape underneath it, a horizontal frame may work best. When the lights are reaching high above the horizon, a vertical composition can do a better job of showing that height and movement. I let the shape of the aurora and the landscape decide.
When I Use a Single Exposure vs. a Composite
Some of my Northern Lights images are single exposures, and some are composites. For me, the decision often comes down to whether one exposure can give me what I want from both the sky and the foreground.

When One Exposure Works
If I can expose the aurora properly and still keep enough detail in the landscape, I’m happy to work with a single frame. Sometimes the light and conditions line up well enough that everything I need is already there.
I’m still paying attention to how the foreground and sky balance each other, but when one exposure works, there’s no reason to make the process more complicated.
Why I Sometimes Use a Composite
Other scenes are harder to balance. The exposure I want for a bright, moving aurora may leave the foreground much darker than I want it. The landscape and sky can need very different exposures, especially when there is such a big difference between the darkest and brightest parts of the scene.
That’s where a composite can help. I can use different exposures to balance the sky and foreground so both parts of the scene have the detail I want in the final image. I think it’s important to be transparent about that. A composite is simply another tool I use when one exposure can’t capture the scene the way I want.
Keeping the Final Image True to the Scene
No matter what editing technique I’m using, I still want the finished image to support what I experienced instead of forcing a completely different look onto it.
That’s the same way I approach editing in Lightroom. The edit should help the photo, not completely replace what was there. My Lightroom presets for landscape and travel photography are the same starting points I use in my own editing, but I still adjust them based on the light, color, and conditions in each image.
I also shoot in RAW because it gives me more flexibility when I’m working with difficult light and a big difference between the sky and foreground. That extra information is one of the reasons shooting in RAW gives me more flexibility when editing, especially in challenging light.
If you want to experiment with that kind of starting point on your own photos, you can also download my free Lightroom preset and adjust it to fit your own light and colors.
Read next: How to Edit Photos with Presets in Lightroom
What I Pay Attention to Once the Aurora Starts
Once the Northern Lights appear, it’s really easy to get excited and just start firing off frames. I try to keep checking three things: movement, exposure, and focus.
Keep Checking Focus
I focus on the stars, but I don’t assume my focus will stay perfect for the entire shoot. If I move the camera, touch the lens, or change my setup, I check it again. Zooming into one of my images only takes a few seconds, and it can save me from discovering later that an entire sequence was slightly soft.
Watch the Lights More Than the Camera
I also try not to spend the entire night staring at the back of my camera. The aurora itself is telling me what I need to change. Is it moving faster? Has it suddenly become much brighter? Is the strongest part shifting to another section of the sky? Would the scene be stronger if I moved or changed the frame?
Those changes are more important than holding onto one set of numbers because someone called them the perfect Northern Lights settings.
Keep Adjusting
My 5 to 10 second shutter speed and ISO 3200 to 8000 range give me a solid place to start, but that’s exactly what they are: starting points. The more comfortable you get changing your settings quickly, the easier it becomes to respond to whatever the aurora borealis is doing.
And give yourself permission to get a few shots wrong. Night photography is something you get better at by doing it. Take a frame, look at what happened, make an adjustment, and keep shooting.
Final Thoughts
Shooting the Northern Lights is less about memorizing one perfect camera setting and more about learning how to react to what the sky is doing. I start with a wide, fast lens, a tripod, a shutter speed around 5 to 10 seconds, and ISO somewhere around 3200 to 8000. From there, I watch the brightness and movement of the aurora and adjust as I go.
Just as important, I keep looking at the landscape underneath it. The sky might be incredible, but I still want the entire frame to feel intentional. If seeing the aurora borealis is on your bucket list, I hope this gives you a solid starting point when you finally get the chance to capture it. For more of my weekly landscape photography tips, shooting ideas, and behind-the-scenes advice, you can join me in The Weekly Frame.
Frequently Asked Questions
What are the best camera settings for photographing the Northern Lights?
A good starting point for the Northern Lights is a 5–10 second shutter speed, ISO 3200–8000, and a wide, fast lens around f/2.8 or faster. I adjust those settings throughout the night depending on how bright the aurora is and how quickly it’s moving.
What shutter speed should I use for the Northern Lights?
I typically start with a shutter speed of around 5–10 seconds when shooting the Northern Lights. If the aurora is moving quickly, I shorten the exposure to preserve more of its shape and definition, while slower or fainter activity gives me more room for a longer exposure.
What ISO should I use for aurora borealis photography?
I usually start somewhere around ISO 3200–8000 when capturing the aurora borealis. The exact ISO depends on the brightness of the lights and the rest of my exposure, so I treat that range as a starting point rather than a fixed setting.
How do you focus when shooting the Northern Lights?
I focus on the stars to help keep the Northern Lights sharp. Once I have focus, I check it periodically during the shoot, especially after moving my camera, touching the lens, or changing my composition.
What equipment do I need to photograph the Northern Lights?
The main gear I use for Northern Lights photography is a camera with manual controls, a wide and fast lens, and a sturdy tripod. A lens around f/2.8 or faster helps bring in more light, while the tripod keeps the camera stable during multi-second exposures.
How do I compose a good photo of the Northern Lights?
I compose Northern Lights photos by treating the aurora as part of the landscape instead of only pointing my camera at the sky. I look for foregrounds, reflections, mountains, trees, buildings, or people that add context and scale, then adjust the frame as the shape and position of the aurora changes.
Why do my Northern Lights photos look blurry?
Northern Lights photos can look blurry when the shutter speed is too long for fast-moving aurora, the focus is slightly off, or the camera moves during the exposure. I check my focus on the stars and shorten my shutter speed when I want to capture more definition in faster-moving lights.
Can you capture the Northern Lights in one exposure?
Yes, the Northern Lights can absolutely be captured in a single exposure, and some of my aurora images are single shots. I also use composites when needed because separate exposures can help me balance a bright, moving sky with a much darker foreground.
about the blog
Welcome to my photography blog, your comprehensive guide to mastering the art and science of photography. I’m Paige, ready to guide you on a journey of discovery, from capturing the perfect composition to deciphering the complexities of file formats and storage. This is where we will cover will include in-depth discussions on cameras, exploration of editing techniques, and a deep dive into photography’s fascinating world. Whether you’re a budding enthusiast or an experienced photographer seeking to sharpen your skills, I’m committed to helping you elevate your craft to the next level. Get ready to transform your passion into prowess, one click at a time. Welcome to your photography journey!
Share This Post
Subscribe For More!
Be the first to see the latest posts
More Photography Posts


What I use as a Professional Photographer – Camera Gear
Camera gear is a bottomless black pit that will suck up all your money… What do I use and why do I love it? Don’t buy things you don’t need.

Shooting In Raw – Understanding Bit Depth and Dynamic Range
Don’t just do it, understand why you do it! The answer to your editing struggles might be in your file type.