

How to Take Better Photos in Harsh Midday Light
Photographers hear a lot about waiting for golden hour. The light is softer, the shadows are longer, and the colors often feel warmer and easier to work with.
But when you are traveling, you cannot always wait for perfect light. Sometimes you are standing in front of something incredible at noon. The sun is high, the shadows are strong, and this may be your only chance to photograph the scene.
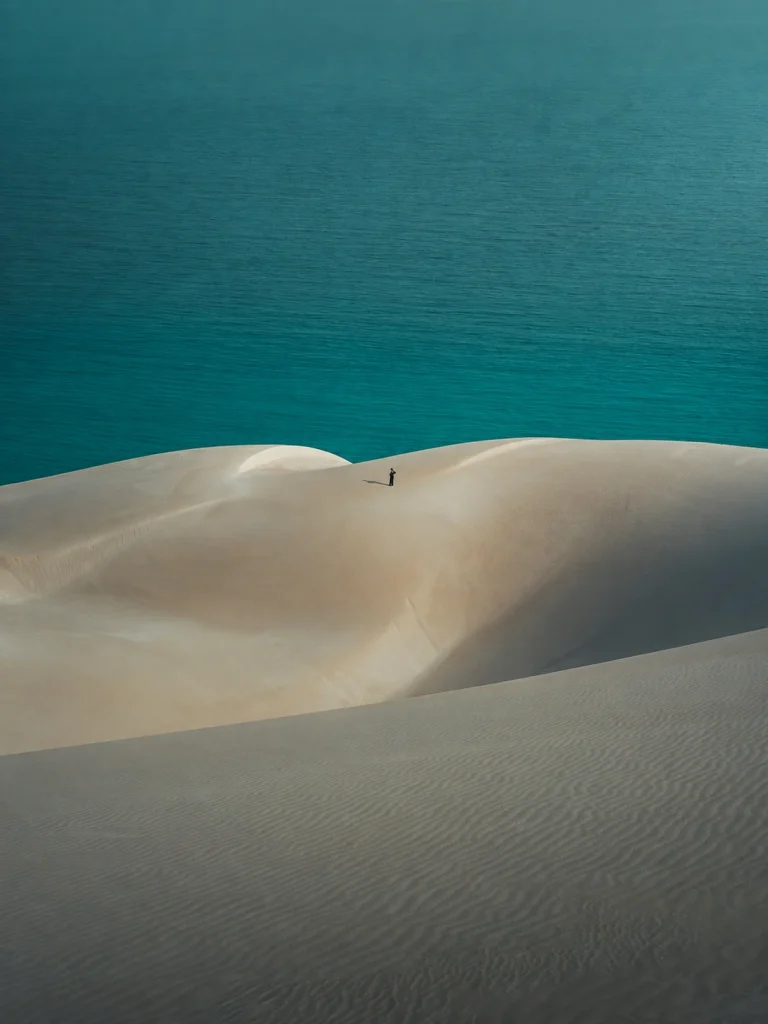
I learned this while shooting in Socotra, where the midday sun could feel intense and unforgiving. Instead of continuing to fight the light, I started paying attention to what it was actually doing well.
Harsh light is not always bad light. It is simply different light. Midday sun can create bold contrast, make saturated colors stand out, reveal texture, and give you compositions that would not look the same during sunrise or sunset. The key is to stop trying to make noon look like golden hour and start working with the light you have.
about the blog

Welcome to my photography blog, your comprehensive guide to mastering the art and science of photography. I’m Paige, ready to guide you on a journey of discovery, from capturing the perfect composition to deciphering the complexities of file formats and storage. This is where we will cover will include in-depth discussions on cameras, exploration of editing techniques, and a deep dive into photography’s fascinating world. Whether you’re a new enthusiast or an experienced photographer seeking to sharpen your skills, I’m committed to helping you elevate your craft to the next level. Welcome to your photography journey!
Subscribe For More!
Be the first to see the latest posts
Table of Contents
Share This Post
Disclosure: Please be aware that some of the links in this post are affiliate links, and I may receive a commission if you make a purchase using those links. However, I only recommend products or services that I personally use or believe will be valuable to my readers. Affiliate links are a way for me to earn a small commission and keep providing you with high-quality content. If you have any questions or concerns, please feel free to contact me through my contact page. Thank you for your support!
Why Midday Light Can Be Difficult to Photograph

Midday light usually comes from high above the landscape. This can create bright highlights, deep shadows, and a large difference between the lightest and darkest parts of the scene. Your camera may struggle to keep detail in both areas at the same time. A bright sky can lose detail while the land looks too dark, or the shadows may become heavy if you expose for the highlights.
Overhead light can also make some landscapes feel flatter. When light falls straight down, it may not create the same long shadows and side lighting that help mountains, rocks, and trees show their shape. That does not mean the light is unusable.
Strong highlights and shadows can become part of the composition when you place them intentionally. Understanding how light and shadow shape a landscape photo makes it easier to see midday conditions as a creative option instead of a problem you have to fix.
What Harsh Midday Light Can Do Well
Midday sun has its own strengths. Some subjects actually look better when the light is bright, direct, and crisp. The goal is not to pretend the photo was taken at another time of day. Let the light keep its bold character and use that look to support the scene.
Create Strong Contrast
Harsh midday light can create clear shapes and dramatic separation between bright and dark areas. While photographing the dragon blood trees in Socotra, I tried shooting directly underneath them and looking upward. The light was extremely bright, but it bounced off the ground and illuminated the undersides of the trees. That reflected light made the shapes and details beneath the branches stand out in a way I may not have seen during softer light.
Instead of avoiding the shadows, I used them as part of the frame. A strong shadow can simplify a busy section of the photo, frame a brighter subject, or create a line that moves through the composition. Bright areas naturally pull attention, so you can use them to lead the viewer toward the most important part of the scene.

The key is making sure the contrast supports the subject. Using contrast in landscape photography works best when the light helps the viewer know where to look instead of making every part of the frame compete for attention.

Make Saturated Colors Stand Out
Some colors thrive in direct sunlight. The turquoise water in Socotra looked completely different in the middle of the day. It appeared brighter, clearer, and more saturated than it did during sunrise or sunset. Strong daylight can work especially well for blue water, colorful rock, tropical landscapes, flowers, painted buildings, and scenes where clear color is already part of the subject.
The sun may create stronger contrast, but it can also reveal colors that softer light does not show as clearly. That does not mean every color needs to be pushed harder during editing. The strongest color should still support the subject and fit naturally with the rest of the frame. Bright water or rock can become a natural focal point when you are using color intentionally in landscape photography.
Reveal Texture and Small Details

Crisp, direct light can be beautiful for textures, patterns, and smaller subjects. The light creates small highlights and shadows across uneven surfaces. This can reveal cracks in rock, lines in sand, tree bark, leaves, architecture, and other details that might appear flatter in softer light.
Midday can be a great time to stop focusing only on the widest view and look closer. A small section of rock, a pattern in the ground, or the shape of one tree may work better than trying to fit the entire landscape into the frame. Direct sunlight can be especially useful when you want to find and capture texture in photography, because the stronger light makes ridges, layers, and surface details easier to see.
Build the Composition Around the Light
When the sun is not going to move anytime soon, changing your own position can make the biggest difference. Instead of waiting for the scene to improve, look for an angle where the current light becomes useful.
Treat Shadows as Shapes
Midday shadows are often dark and clearly defined. Rather than trying to remove them, look at the shapes they create. A shadow can form a diagonal line across sand, frame part of a building, separate one section of a canyon, or create a darker area around a brighter subject. These darker spaces can also give the viewer’s eye somewhere to rest.
When a scene has a lot of detail and strong sunlight, using quieter areas to simplify the composition can keep the photo from feeling too crowded. Look around the edges of the frame too. A dark shadow near the border may help keep attention inside the photo, while a bright patch at the edge may pull the viewer away from the subject.

Change Your Camera Angle
Eye level is not always the strongest angle in midday light. Try getting lower, looking upward, shooting across the direction of the light, or moving into a shaded area and photographing toward the brighter scene.
In Socotra, looking upward from beneath the dragon blood trees changed the way the light reached them. A difficult overhead sun became reflected light that revealed details underneath the branches.
A lower angle can also help hide a bright empty sky, make foreground patterns more visible, or place the sun behind part of the subject. Small movements can completely change the perspective of a photograph and the way light moves through the frame.

Look for Reflected Light
Direct sunlight is only one part of what is happening in the scene. Bright sand, pale rock, water, roads, and light-colored walls can bounce sunlight back into darker areas. This reflected light may soften shadows or illuminate parts of the subject that would otherwise look too dark.
If a subject is in shadow, look at what is around it. The ground or a nearby surface may be sending light back toward the subject. Reflected light can be especially helpful when photographing beneath trees, inside narrow canyons, near bright beaches, or around light-colored rock.
Protect the Highlights
When the light is harsh, I usually prioritize protecting the brightest parts of the photo. In very bright conditions, I may underexpose by around one to two stops. The exact adjustment depends on the scene and camera, but the goal is to keep important highlights from becoming completely white. Bright skies, pale rock, clouds, and reflections on water can lose detail quickly.
You can often recover a surprising amount of shadow detail later, especially when shooting in RAW. Completely clipped highlights are much harder to restore because the original detail may no longer exist in the file. This is where understanding the exposure triangle becomes useful. Shutter speed, aperture, and ISO all affect how much light reaches the image, so adjusting one setting may mean balancing the others.
Check the Histogram
The image on the back of your camera can be difficult to judge in bright sunlight. Your screen may look darker or brighter depending on its settings and the light around you. The histogram gives you a more reliable way to see how the exposure is distributed. If the information is pressed hard against the right side of the histogram, some highlights may be clipping.
The goal is not always to protect every tiny bright reflection. A sparkle on water or a direct view of the sun may naturally be very bright. Focus on preserving detail in the important areas of the image. Your camera’s highlight warning can help too. It shows which areas may have lost detail, so you can decide whether to lower the exposure and take another version.
Use Metering as a Starting Point
Camera metering can help you choose an initial exposure, but it may not always understand which parts of the scene matter most. A dark landscape below a bright sky may confuse the camera and lead to an exposure that is too bright or too dark. Learning how camera metering works in difficult light makes it easier to recognize when you need to adjust the exposure yourself.
Keep the ISO Low
Bright midday conditions usually give you plenty of light, so begin with a low ISO when possible. ISO 100 is often a good starting point. It helps keep the file clean and gives you more flexibility when editing shadows and color later. From there, choose your aperture based on how much of the scene you want sharp, then adjust the shutter speed to complete the exposure.
Shoot in RAW
RAW files are especially helpful when you are working with bright highlights and deep shadows. They preserve more image data than JPEG files, giving you more room to adjust exposure, recover shadow detail, control highlights, and correct white balance later. This does not mean every underexposed photo can be fixed perfectly. You still want to get the exposure as close as possible in the field. RAW simply gives you more flexibility when the light is difficult.
I rely on shooting landscape photos in RAW because the extra information helps me make careful adjustments without pushing the file as far. It is particularly useful in midday scenes where bright water, light-colored rock, dark shadows, and strong color all appear in the same frame.
Try Filters Carefully
Filters can change the way bright light appears, but each one creates a different look. The important thing is to understand that the effect becomes part of the original photograph. You cannot always remove it completely later.
Test a Mist Filter
A mist filter can soften harsh highlights and reduce some of the crispness of direct sunlight. This can work well when you want the bright areas to glow slightly or you want the scene to feel less sharp and clinical.
I recommend taking photos both with and without it. Once the mist effect is recorded, the image will not look exactly the same as a clean file. Testing both versions gives you more choices later and helps you decide whether the filter supports the mood of that particular scene.
Remove the Filter for a Defined Sunstar
A mist or diffusion filter can soften the points of a sunstar. When I want the sun to create a clearer star shape, I remove the filter and position the sun near the edge of a tree, rock, mountain, building, or another part of the scene. Partially blocking the light makes it easier to control the flare and can create a more defined sunstar.
An aperture around f/8 to f/11 can help create sharper points, although the exact look also depends on the lens. This is similar to how I work when capturing golden light and sun flare, even though the midday sun produces a stronger and more intense result.

Use a Lens Hood
A lens hood can help block stray light from hitting the front of the lens. This reduces unwanted flare and helps maintain contrast, especially when the sun is outside the frame but still shining across the lens.
Flare is not always bad. I use it when it adds warmth, atmosphere, or direction. The goal is to make it intentional. The filters, lenses, and other camera gear I use in the field give me different options depending on the light and the kind of photograph I want to make.
When Midday Light May Be the Best Light
Some places genuinely look better in the middle of the day. Clear turquoise water often shows its color most strongly when the sun is high enough to reach into it. Colorful landscapes may look more vivid. Rock layers, tree bark, sand patterns, and architectural details can gain definition from crisp direct light. Midday sun can also work well for graphic shadows, geometric compositions, overhead views, and close-up details.
The best light depends on the subject. Golden hour may be beautiful for warm mountain light, but it is not automatically the best choice for every scene. Blue water may lose its brightness near sunset. A canyon may become too dark when the sun drops lower. A pattern may need stronger directional light to become visible. Instead of choosing the time of day only because it is considered ideal, pay attention to what the location needs.
Edit Midday Photos Without Turning Them Into Golden Hour
When I edit photos taken at noon, I do not try to make them look like they were photographed at sunset. Midday light has its own character. The strong contrast, clean color, and defined shadows are part of what makes the image different. I begin with exposure and highlights. I lower bright areas if they feel distracting, then carefully open the shadows without removing all their depth.
Lifting every shadow too far can flatten the photo and erase the shapes that made the midday composition work. Using Lightroom masks for local adjustments lets me work on specific parts of the frame instead of reducing contrast everywhere. I might brighten the subject, soften one harsh area, or darken an edge that is pulling attention away.
Color may need a little attention too. Direct light can make certain blues, greens, yellows, or oranges feel intense. Adjusting individual colors with the HSL panel gives me more control without changing every color in the image. The tone curve can help shape the overall contrast, but I use it carefully. A small adjustment is usually enough to add depth without crushing the shadows or making the highlights too sharp. This guide to using the tone curve in Lightroom explains how those tonal changes work.
Local light adjustments can also guide the eye. Carefully dodging and burning the landscape helps bring attention toward the subject while keeping the midday look believable. The final edit should still feel like bright midday light. It does not need the warmth, softness, or glow of golden hour to be successful.
When Softer Light May Work Better
Midday light is useful, but it is not always the right choice. Softer light may work better when the scene depends on fog, delicate color, gentle transitions, portraits, or a quiet mood. A forest may feel calmer under clouds. A mountain may show more shape when the sun is lower. A reflective lake may need softer light to hold detail in both the water and sky.
Waiting may also make sense when the contrast is so extreme that the important highlights and shadows cannot be preserved in one exposure. The goal is not to prove that noon is always better. It is to recognize when the light supports the subject and when another time of day would tell the story more clearly.
Final Thoughts
Photographing in harsh midday light became much easier when I stopped trying to fight it. Socotra showed me that noon can create bold shadows, clear texture, bright color, and compositions that would not look the same during golden hour.
The next time you find yourself in front of an incredible scene in the middle of the day, take a moment to notice what the light is doing well. Look for shapes in the shadows, change your camera angle, watch for reflected light, and protect the highlights. Shoot in RAW, try different filters when they support the look, and let the final edit keep some of that strong midday character.
Thanks so much for reading. I hope this helps you feel more confident when your travel plans put you in beautiful places at the brightest time of day. You can also practice editing challenging light with my free Lightroom preset or explore my Lightroom presets for landscape and travel photos for more starting points.
Read next: How to Plan a One-Day Landscape Photography Shoot
Frequently Asked Questions
Is midday light bad for photography?
Midday light is not bad for photography, but it creates brighter highlights, deeper shadows, and stronger contrast. It can work especially well for bold colors, clear water, textures, patterns, and graphic compositions.
How do you take good photos in harsh midday light?
Take good photos in harsh midday light by protecting the highlights, using shadows as part of the composition, and changing your camera angle. Look for reflected light, strong color, and textures instead of trying to make the scene look like golden hour.
What camera settings are best for harsh midday sun?
Start with a low ISO, choose an aperture based on how much of the scene you want sharp, and adjust the shutter speed for the correct exposure. Check the histogram and highlight warning to make sure important bright areas are not losing detail.
Should you underexpose photos taken in bright sunlight?
Slightly underexposing can help protect important highlights in bright sunlight. I may lower the exposure by around one to two stops in extreme light, but the exact amount depends on the scene and how much detail the camera can preserve.
Is RAW better for harsh-light photography?
RAW is usually better for harsh-light photography because it keeps more image data than JPEG. This gives you more flexibility to recover shadows, control highlights, adjust white balance, and refine strong colors during editing.
How do you edit photos taken in harsh midday light?
Edit harsh midday photos by reducing distracting highlights, opening shadows carefully, and using masks for local adjustments. Keep enough contrast to preserve the character of the original light instead of trying to turn the image into a soft golden hour photo.
about the blog
Welcome to my photography blog, your comprehensive guide to mastering the art and science of photography. I’m Paige, ready to guide you on a journey of discovery, from capturing the perfect composition to deciphering the complexities of file formats and storage. This is where we will cover will include in-depth discussions on cameras, exploration of editing techniques, and a deep dive into photography’s fascinating world. Whether you’re a budding enthusiast or an experienced photographer seeking to sharpen your skills, I’m committed to helping you elevate your craft to the next level. Get ready to transform your passion into prowess, one click at a time. Welcome to your photography journey!
Share This Post
Subscribe For More!
Be the first to see the latest posts
More Photography Posts


What I use as a Professional Photographer – Camera Gear
Camera gear is a bottomless black pit that will suck up all your money… What do I use and why do I love it? Don’t buy things you don’t need.

Shooting In Raw – Understanding Bit Depth and Dynamic Range
Don’t just do it, understand why you do it! The answer to your editing struggles might be in your file type.