

Blue Hour vs. Golden Hour: When Is the Best Time to Take Photos?
I almost always prefer shooting during golden hour because I love working with light. Watching warm light move across a mountain, catch the edge of a tree, or hit one part of a landscape gives me so much to work with when I’m building a composition.
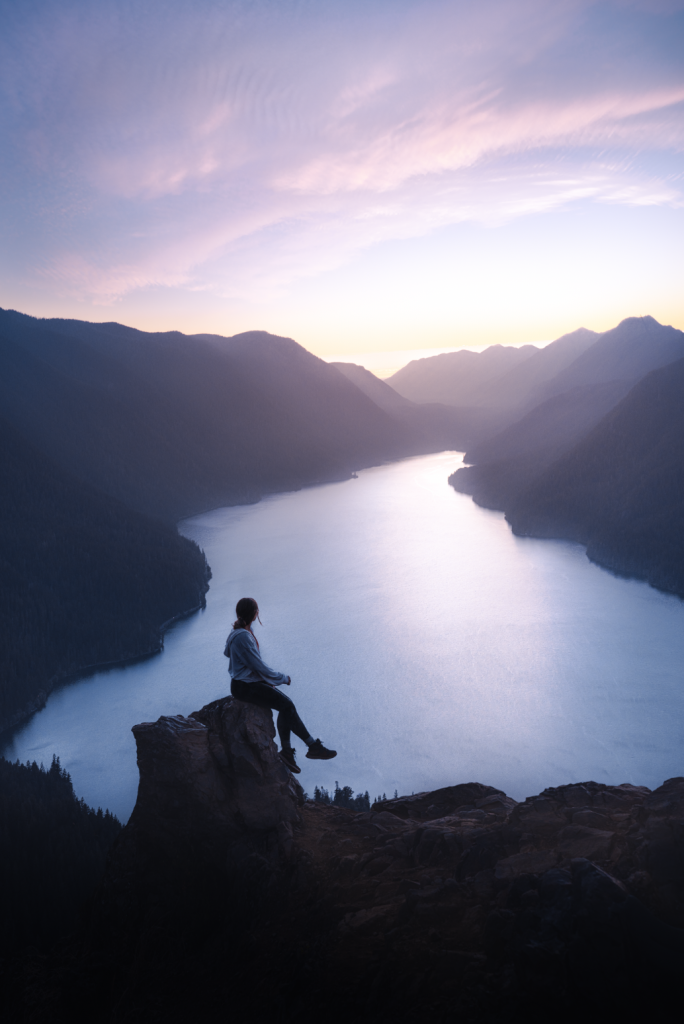
But blue hour might actually be my favorite part of a sunset to experience in person. There is something about that deep blue glow after the sun disappears that feels completely different. The cool light seems to bounce off everything around you, and I still feel like photos never quite capture how beautiful it looks to the eye.
So, is blue hour or golden hour better for photography? I don’t think one is always better. They create very different photos, and the right choice depends on the scene, the mood, and how you want to work with the light.
about the blog

Welcome to my photography blog, your comprehensive guide to mastering the art and science of photography. I’m Paige, ready to guide you on a journey of discovery, from capturing the perfect composition to deciphering the complexities of file formats and storage. This is where we will cover will include in-depth discussions on cameras, exploration of editing techniques, and a deep dive into photography’s fascinating world. Whether you’re a new enthusiast or an experienced photographer seeking to sharpen your skills, I’m committed to helping you elevate your craft to the next level. Welcome to your photography journey!
Subscribe For More!
Be the first to see the latest posts
Table of Contents
Share This Post
Blue Hour vs. Golden Hour: What's the Difference?


Golden hour and blue hour happen close together, but the light during each one can completely change the way a scene looks. Golden hour happens shortly after sunrise and before sunset when the sun is low in the sky. The light is usually warmer, softer than midday sun, and more directional. You can actually see where the light is coming from and use the highlights and shadows as part of the composition.
Blue hour happens before sunrise and after sunset when the sun is below the horizon but there is still enough indirect light in the sky to see the scene. The colors become cooler, shadows soften, and artificial lights start to stand out more.
What Golden Hour Looks Like
If I have the choice, I usually prefer shooting during golden hour. With the sun still above the horizon, I have an actual light source to work with. It may hit one side of a mountain, light up a foreground, create long shadows, or give me a chance to include a sun flare.
That direction is what I love. Instead of everything getting the same light, some parts of the scene become brighter while others fall into shadow. Those differences create shape and can make a landscape feel much more layered. I share more about the ways I work with this kind of light in my guide to capturing golden light in landscape photography.
What Blue Hour Looks Like
Blue hour feels much softer and cooler. Once the sun drops below the horizon, the warm direct light disappears. The scene slowly shifts toward blue, strong shadows begin to soften, and any artificial lights around you become much more noticeable. The change can happen fast. One minute there may still be warm color near the horizon, and not long after that the whole scene starts taking on those deeper blue tones.
This is also one of those times when I think being there can feel even better than seeing the final photo. I love the way that blue light seems to bounce across mountains, buildings, water, and everything around me. I’m still trying to get better at capturing that exact glow.
The biggest difference between golden hour and blue hour is really how the light feels. Golden hour tends to feel warmer, more directional, and more dimensional. Blue hour feels cooler, softer, quieter, and sometimes more cinematic. Light is always part of the composition for me. Highlights and shadows can change the shapes in a scene, separate layers, and help guide your eye. I talk more about that in my guide to using light and shadow in landscape photography.
When I Prefer Golden Hour
I usually choose golden hour when the landscape needs more direction from the light. I love being able to see the light move through a scene and decide how I want to use it instead of having everything lit evenly.


When the Landscape Needs More Dimension
Mountains, dunes, rock formations, trees, and textured foregrounds can look completely different once low sunlight starts hitting them from the side. One ridge might light up while another falls into shadow. Small textures suddenly become easier to see. Layers that felt flat earlier in the day start separating from each other.
This is one of the biggest reasons I love golden hour for landscapes. I’m not just looking at the mountain or the desert itself. I’m watching what the light is doing to it. Sometimes I’ll wait for one small patch of light to reach the part of the scene I want people to notice first. Other times, the shadows are doing just as much work as the bright areas.
When Warm Color Fits the Scene
Golden hour can also be beautiful when the landscape already has warm colors. Autumn is an obvious example. Reds, oranges, and yellows can feel even richer when warm sunlight moves through the trees.
Desert landscapes are another favorite. Sandstone, dunes, and warm-colored rock can look incredible with low light hitting them. I still don’t want every sunset photo to become completely orange. The goal is not to force warm color into the scene. I want the light to support what is already there.
When I Want to Use the Sun in the Frame
Golden hour also gives me more ways to use the sun itself. I might shoot toward the light, place the sun near the edge of a mountain or another subject, use flare intentionally, or create a more defined sunstar.
Those options start disappearing once the sun moves farther below the horizon. That is probably the simplest reason I usually choose golden hour. I like having visible light to work with and deciding where that light belongs in the frame.
When Blue Hour Can Be the Better Choice
Even though I reach for golden hour more often, there are definitely scenes where blue hour works better. At that point, I’m no longer building everything around direct sunlight. I start paying more attention to atmosphere, color, reflections, and any artificial light in the scene.


When Warm Artificial Light Is Part of the Scene
This is where blue hour can get really good. Street lamps, lanterns, restaurant windows, temples, headlights, and other artificial lights start glowing while there is still enough color in the sky. That warm light against the cool blue background can create a completely different look from what you had ten or twenty minutes earlier.
It is one reason I love shooting cities and travel scenes during blue hour. Night markets, illuminated buildings, busy streets, and temples can all become more interesting once the lights start coming on. Once the sky goes completely black, some of that balance disappears. During blue hour, you can often keep detail and color in the sky while letting those warmer lights become part of the scene.
When I Want a Softer, Quieter Mood
Blue hour can also work really well when strong directional light would compete with the scene. Calm water is a good example. A cool blue sky reflected across a lake can create a completely different feeling from the same place during sunset. Architecture, quieter streets, and simple landscapes can also look great under softer light.
Reflections can become especially interesting because you may have both the blue sky and warm lights showing up in the water. I share more ideas for working with those kinds of scenes in my reflection photography tips.
Morning vs. Evening Blue Hour
You actually get two chances at blue hour each day. Morning blue hour happens before sunrise. It is often quieter, especially in popular locations, and the light slowly transitions from cool blue into the warmer tones of sunrise. Evening blue hour happens after sunset.
For travel photography, I especially like evening blue hour because cities and streets already have more energy. Lights start coming on, restaurants are glowing, headlights appear, and all of that becomes part of the scene. I don’t think one is automatically better. It really depends on the location and the feeling I’m trying to capture.
How I Shoot Golden Hour and Blue Hour in the Same Session
You don’t always need to choose between them. Some of my favorite shooting sessions happen when I stay in the same area long enough to watch the light change from golden hour into blue hour. A scene can look completely different in thirty or forty minutes.
Scout Before the Light Starts Changing
Both golden hour and blue hour move quickly, but blue hour can feel especially short. I don’t want to spend those minutes looking for parking, figuring out where I should stand, or deciding what I even want to shoot. When I can, I arrive early enough to walk around and look at possible compositions before the best light starts. I think about where the sun is going to move, which direction I want to face, and whether I might want to stay in the same spot after sunset.
If I’m working with a really limited travel window, I plan even more ahead of time. My guide to planning a landscape photography shoot when you only have one day goes into how I research locations, light, weather, and backup options before I arrive. The goal isn’t to plan every shot before I get there. I just want to remove enough of the guesswork that I can react quickly when the light starts doing something interesting.
Stay After the Sun Goes Down
This is probably the easiest blue-hour tip to miss. Don’t pack up just because sunset is over. A lot can happen after the direct sunlight disappears. The sky gets cooler. Artificial lights become brighter. Reflections change. The balance between the land and sky shifts.
A scene that felt warm and dramatic during golden hour may suddenly feel calm and completely different. Sometimes I get the shot I came for during golden hour. Sometimes staying another twenty minutes gives me something I didn’t expect at all.
Adjust Your Camera as the Light Fades
As blue hour begins, you’ll have less available light, so your camera settings need to change with it. I shoot RAW because it gives me much more flexibility with both exposure and color later. That is especially useful during blue hour because I don’t want the camera deciding that all of those cooler tones need to be neutralized. You can read more about why I prefer shooting photos in RAW.
Your shutter speed will also start getting slower as the light fades. If I have a tripod with me, that gives me more freedom to work with longer exposures. If I’m shooting handheld, though, I’m completely comfortable increasing ISO when I need to.
I would much rather come home with a sharp photo that has a little noise than a blurry photo because I was afraid to raise my ISO. Modern cameras handle higher ISO settings better than a lot of people expect. If you’re still figuring out how it works, my guide to ISO in photography explains it in more detail.
White balance is worth paying attention to too. Auto white balance may try to “fix” some of the blue color in the scene and make everything look more neutral. Because I shoot RAW, I don’t worry about getting it absolutely perfect in camera, but I do want to keep the atmosphere that made me want to take the photo in the first place.
So, Is Blue Hour or Golden Hour Better for Photography?
Neither one is better for every scene. I would choose golden hour when I want warm directional light, stronger shadows, more texture, sun flare, or light moving across a landscape. I would choose blue hour when I want cooler tones, softer light, reflections, a quieter mood, or warm artificial lights against a deep blue sky.
Personally, I still prefer shooting golden hour most of the time. I love working directly with light and seeing how it changes the shapes and layers in front of me. But blue hour might still be my favorite part of sunset to actually experience. That blue glow can look incredible when you’re standing there, and I’m still trying to get better at showing exactly what it feels like in a photo.
The biggest thing I’ve learned is not to assume the shoot is finished once the sun goes down. Stay a little longer. Watch what happens to the color. Notice which lights start turning on. Pay attention to reflections and how the whole mood changes. Sometimes golden hour gives you exactly the shot you planned. Sometimes blue hour gives you the one you didn’t know you were waiting for.
Thanks so much for reading. I hope this helps you decide which kind of light works best for the scene in front of you and reminds you to keep shooting a little longer after sunset.
Curious how I edit my travel and landscape photos? You can start with my free Lightroom preset or explore the preset packs I use for my own photos. They’re designed for both mobile and desktop and give you a starting point you can adjust for the light and color in your own images.
And if you enjoy practical photography tips, travel stories, and behind-the-scenes updates from my shoots, you can join me in The Weekly Frame if you haven’t subscribed yet.
Frequently Asked Questions
Is blue hour or golden hour better for photography?
Neither blue hour nor golden hour is always better because they create very different types of light. Golden hour works well for warm, directional light and stronger shadows, while blue hour is great for cooler tones, softer scenes, reflections, and artificial lights.
What is the difference between blue hour and golden hour?
Golden hour happens when the sun is low above the horizon and creates warm, directional light. Blue hour happens when the sun is below the horizon, creating softer ambient light with cooler blue tones.
Does blue hour happen before or after sunset?
Blue hour happens both before sunrise and after sunset. Morning blue hour slowly transitions into sunrise, while evening blue hour begins after sunset and fades into nighttime.
How long does blue hour last?
Blue hour does not always last a full hour, and the strongest blue light may only last for a short window. The exact timing depends on your location, season, and how far the sun is below the horizon, so I like to be ready before it starts.
What camera settings are best for blue hour photography?
The best blue hour settings depend on the scene, but you’ll usually need a slower shutter speed or higher ISO as the light fades. Shooting RAW also gives you more control over exposure, white balance, and those cooler blue tones when you edit.
Do you need a tripod for blue hour photography?
You don’t always need a tripod for blue hour photography, but it helps once the light becomes too low for a sharp handheld shot. If I’m shooting handheld, I’d rather raise the ISO enough to keep the image sharp than use a shutter speed that is too slow.
Is morning or evening blue hour better?
Morning blue hour is often quieter and less crowded, while evening blue hour usually has more artificial lights and activity. I choose based on the location and whether I want a calmer scene or the contrast between warm lights and a cool blue sky.
Should you shoot RAW during blue hour?
RAW is especially useful during blue hour because it keeps more image data and gives you greater control over exposure and white balance. It also makes it easier to keep the natural blue atmosphere instead of letting automatic white balance remove too much of the color.
about the blog
Welcome to my photography blog, your comprehensive guide to mastering the art and science of photography. I’m Paige, ready to guide you on a journey of discovery, from capturing the perfect composition to deciphering the complexities of file formats and storage. This is where we will cover will include in-depth discussions on cameras, exploration of editing techniques, and a deep dive into photography’s fascinating world. Whether you’re a budding enthusiast or an experienced photographer seeking to sharpen your skills, I’m committed to helping you elevate your craft to the next level. Get ready to transform your passion into prowess, one click at a time. Welcome to your photography journey!